
You should not paint directly over soot on walls; it requires special preparation. Soot must be cleaned and sealed before painting to ensure proper adhesion and appearance.
Dealing with soot-covered walls can be a challenging home improvement task. Painting over soot without proper preparation will lead to poor paint adhesion and may allow stains and odors to seep through your fresh coat. Before tackling the painting process, it’s essential to thoroughly clean the affected area with a degreaser or soot-removal cleaner.
Once cleaned, applying a stain-blocking primer will seal in any remaining soot particles, effectively preventing them from causing issues with your new layer of paint. This preparation ensures that your paint job will look pristine and remain durable over time. It’s also important to use the right type of paint and primer designed for high-stress areas, as they are better equipped to handle the challenges of covering soot-stained surfaces.
The Hazards Of Soot
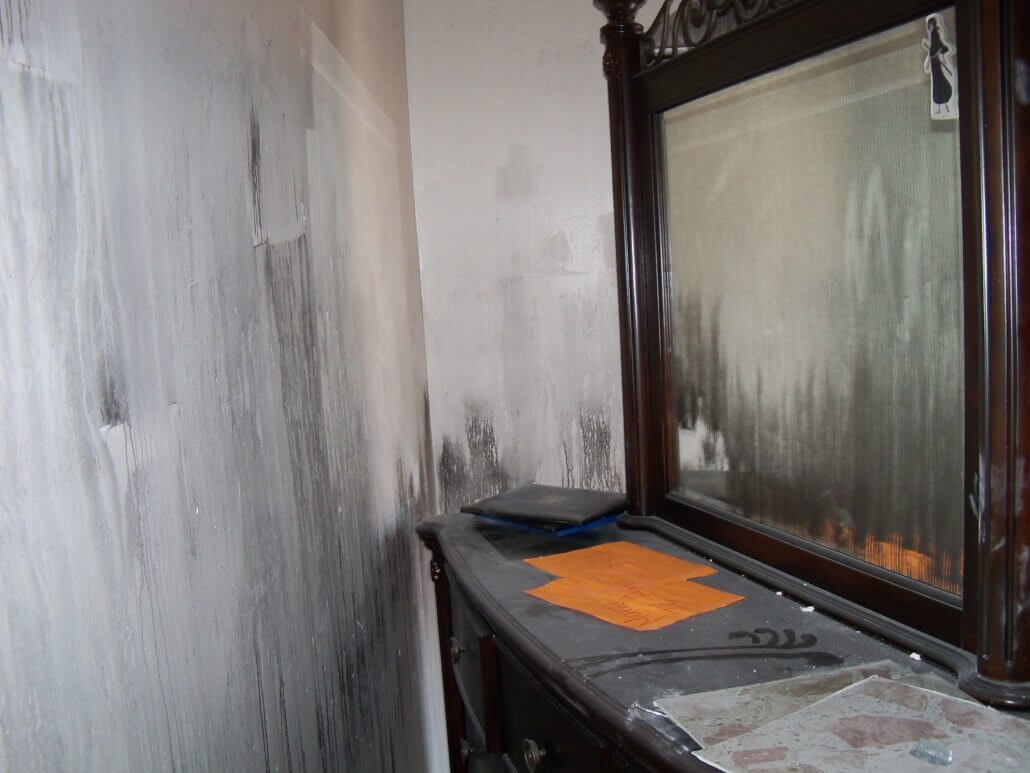
Painting over soot on walls is a risky task. Soot is a carbon residue from incomplete combustion. This residue can contain various harmful chemicals. Exposure to soot can cause respiratory issues and other health problems.
Cleanup requires caution and appropriate gear. Children and pets must stay away from soot-infested areas. Soot can easily spread and make cleaning tougher. Professionals wear masks and gloves for safety. They ensure that the soot does not become airborne. Always ensure proper ventilation during cleanup. This protects your lungs and overall well-being.
Assessment Before Painting
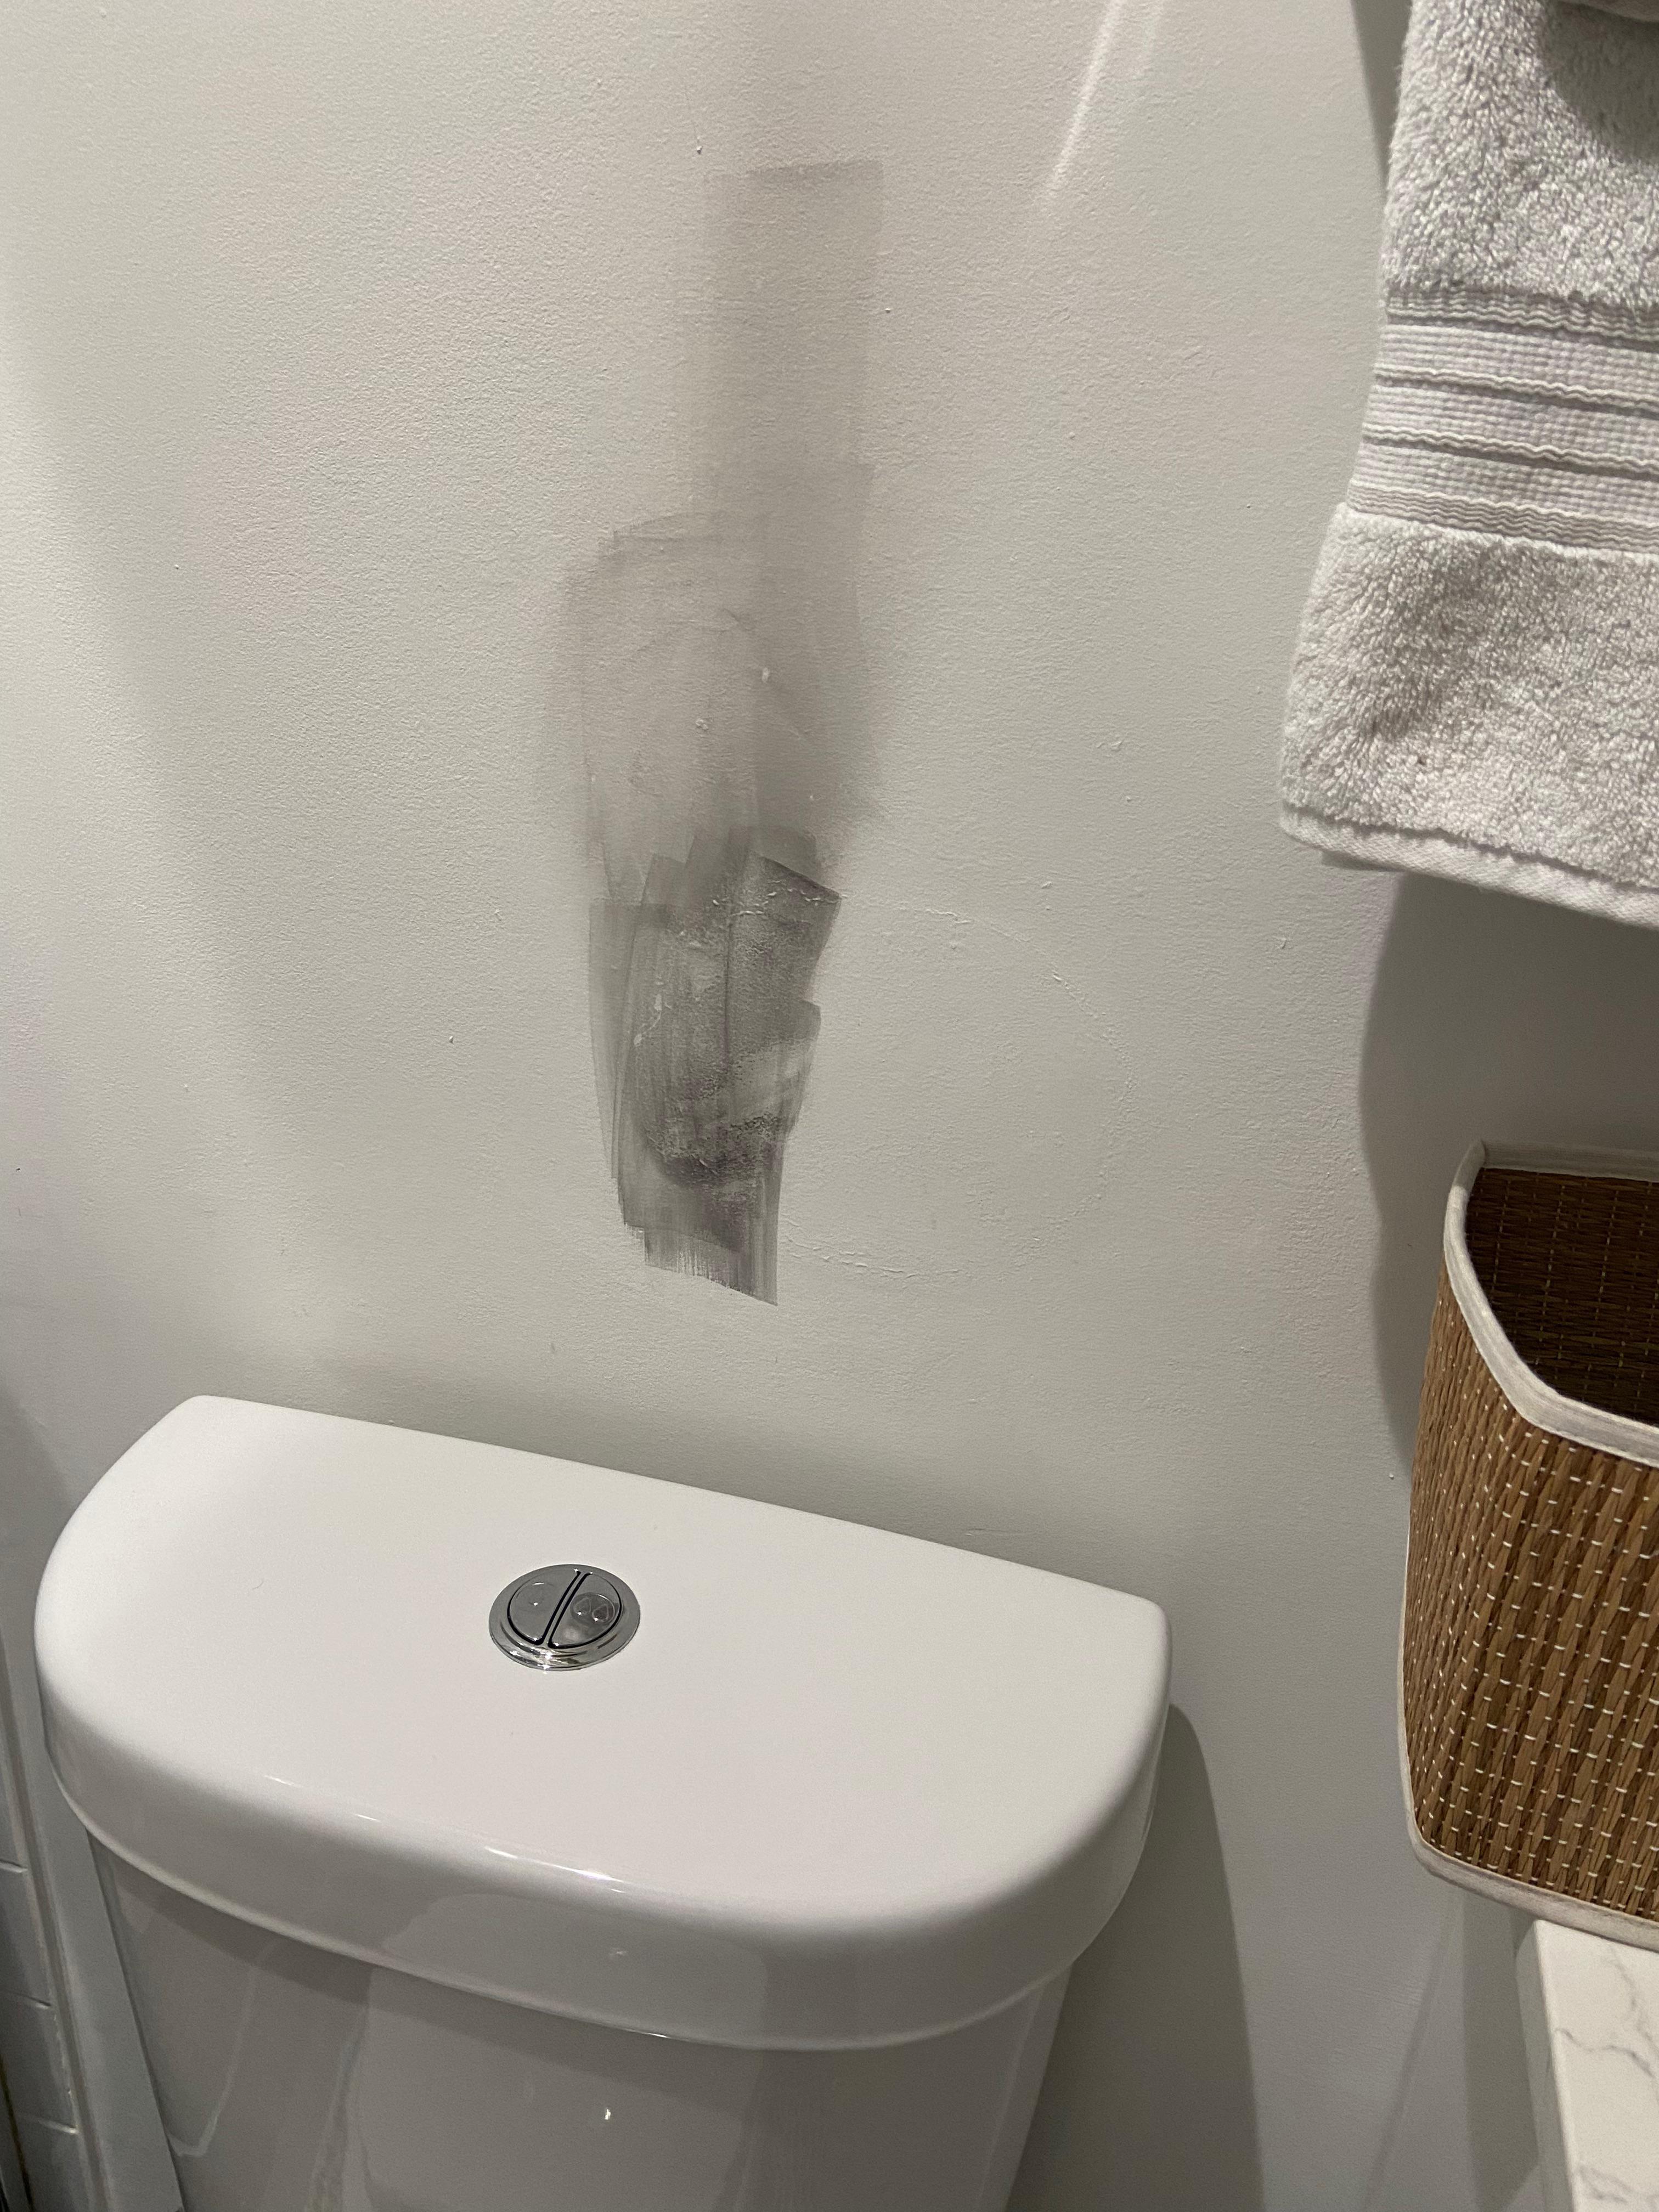
Assessing the level of soot damage on walls is a crucial first step. Small areas with light soot can often be cleaned and painted over by homeowners. Larger areas with heavy soot accumulation may require professional cleaning.
- Check the soot’s thickness by running a finger over the wall.
- If soot smears but doesn’t stick, it’s a lighter layer.
- Thick, oily soot signifies potential underlying damage.
Expert assessment is recommended for significant soot damage. Professional cleaners have specialized equipment. This equipment removes soot safely and effectively before painting.
Preparation Steps For Sooty Surfaces
Before tackling soot on walls, specific cleaning solutions and tools are essential. A dry cleaning sponge works best for loose soot. For tougher stains, a mixture of vinegar and water or commercial soot remover is effective. Always wear safety goggles and gloves to protect yourself.
To safeguard your space, lay down drop cloths or old sheets to catch falling debris. Use painter’s tape to cover trim and ceilings. Ensure good ventilation by opening windows or using fans. This keeps air clean while you work. Empty the room or move items to the center and cover with plastic sheets, preventing soot from spreading.
Credit: www.reddit.com
Techniques For Soot Removal
Painting over soot on walls isn’t advisable without proper cleaning. To effectively remove soot, one should first use a dry cleaning sponge to lift loose particles. This should be done gently to avoid smearing. Afterward, mixing a solution of mild detergent with water helps to cleanse the area. A soft cloth works best to apply this mixture.
Ensuring the wall is completely dry is crucial before starting any paint job. Safety equipment, such as gloves and masks, are also important. Using these tools, the risk of inhaling soot particles is minimized. Vinegar mixed with water can be an alternative cleaner for tougher stains.
Data on common errors can be quite eye-opening. A table offers clarity:
| Mistake | Why to Avoid |
|---|---|
| Skipping Safety Gear | Health risk from soot inhalation |
| Harsh Chemical Use | Potential damage to wall surfaces |
| Wet Cleaning First | Can smear soot, making cleaning harder |
Painting Over Soot: Is It Possible?
Painting over soot on walls requires careful consideration. Soot is a carbon residue left from smoke or incomplete combustion. The oily nature of soot can make adhesion difficult for new paint. To tackle this problem, cleaning the walls thoroughly before painting is essential.
Using a specialized cleaner to remove soot is recommended. Simply painting over soot can lead to peeling and staining. Soot can bleed through the new paint layer, compromising the finish. It’s also important to note that painting over soot without cleaning can be a fire hazard.
Sealing the soot with an appropriate primer ensures a successful painting job. A primer designed for covering stains should be applied before the topcoat of paint.
| Step | Action |
|---|---|
| 1 | Clean the soot with a specialized cleaner. |
| 2 | Dry the walls completely. |
| 3 | Apply a stain-blocking primer. |
| 4 | Paint with the desired topcoat. |
Recommended Paints And Primers
Choosing the right primer is essential for painting over soot. A high-quality oil-based primer is recommended, as it can seal and lock in soot, preventing it from bleeding through the new paint. Shellac primers also offer excellent adhesion and stain blocking properties.
| Primer Type | Benefits |
|---|---|
| Oil-based Primers | Seal soot effectively, prevent bleed-through |
| Shellac Primers | High adhesion, block stains well |
For covering soot, satin or semi-gloss paints are the best choices. They provide a durable finish that can withstand cleaning without compromising the paint. Glossy finishes also allow for easier soot wiping in the future.
Maintaining Painted Walls Post-soot
Maintaining your walls after a soot incident involves routine cleaning. Use a dry sponge to gently remove soot. Avoid water or liquid cleaners.
To prevent future soot buildup, always use proper ventilation. This is crucial when using fireplaces or stoves. Regular chimney inspections and using candles responsibly also help.
Credit: www.reddit.com
Credit: orange-restoration.com
Conclusion
Tackling soot on walls is manageable with the right approach. Before applying fresh paint, clean surfaces and use a primer designed for smoke damage. This ensures a pristine finish and lasting results. Remember, preparation is key for a successful paint job over soot-stained walls.
Embrace these steps for a clean, vibrant space.
I’m Robert M. Payne, a passionate enthusiast for turning houses into dream homes. With a knack for DIY projects and a keen eye for design, I’ve dedicated myself to sharing my knowledge and experiences in the realm of home improvement.
As a seasoned homeowner and avid DIYer, I understand the challenges and joys that come with transforming living spaces. Through Myhomemyworld, I aim to inspire and guide fellow homeowners on their journey to creating spaces that reflect both functionality and style.
Cheers to creating spaces that truly feel like home.
Connect with me in facebook