
To paint a faux stone wall, begin by cleaning and priming the wall, then apply layers of textured paint. Use various shades to mimic natural stone, finishing with sealant for durability.
Creating the illusion of a stone wall with paint transforms an ordinary space into one with a rustic or sophisticated charm. Embarking on this artistic endeavor requires preparation, patience, and creativity. Preparing the surface ensures the paint adheres well and lasts longer, while priming serves as the canvas for your work of art.
With a multitude of textured paint products and techniques available, achieving the authenticity of stone is a matter of layering colors and textures. Sealing your masterpiece protects it from wear and tear, allowing you to enjoy the fruits of your labor for years to come. Whether aiming for a cozy cottage feel or a grandiose castle vibe, painting a faux stone wall is a cost-effective way to add depth and character to any room.
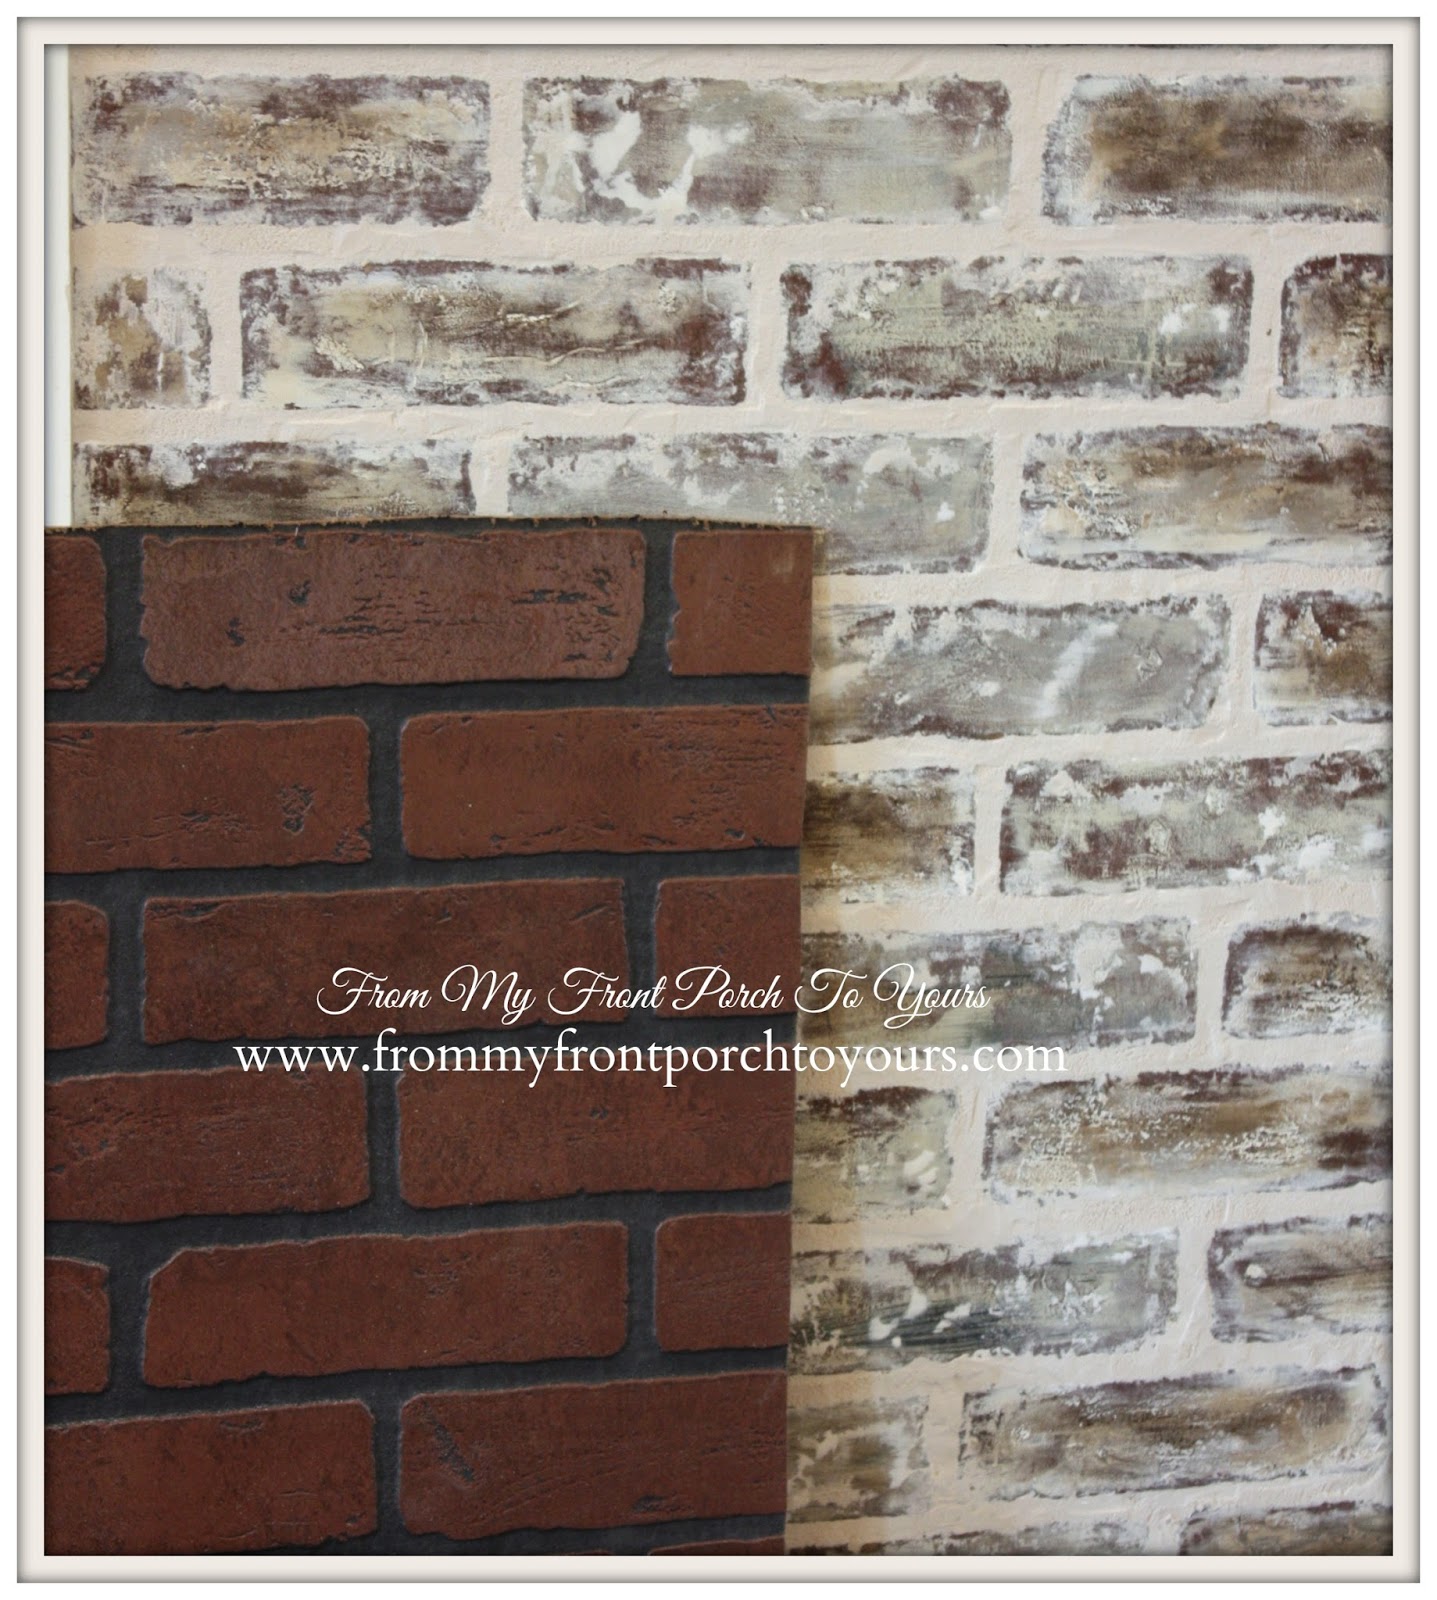
Credit: www.frommyfrontporchtoyours.com
Introduction To Faux Stone Wall Painting
Faux stone wall painting is a trend gaining widespread popularity. This technique simulates the elegant appearance of real stone. It’s a cost-effective and flexible solution compared to natural stone. The painted stone effect brings warmth and texture to any room, while offering creative control over stone shapes and colors. Many prefer this approach because it reduces the expense and effort. Easy to change styles make it ideal for modern dynamic decors.
Advantages are significant with a faux stone paint job. It boosts a room’s aesthetic without heavy materials. Homeowners enjoy a luxurious look without a hefty price tag. Maintenance is simple, needing only occasional cleaning. DIY enthusiasts find the painting process rewarding. Overall, it’s a versatile option to refresh your home’s design.
Materials And Tools Required
Creating a faux stone wall demands specific paints and tools.
Begin by selecting latex paints in stone colors. The base layer requires a neutral tone, with a variety of grays, browns, and beiges for the stone effect. Acrylic paints work well for highlighting details.
| Roller Tray | For holding and rolling paint |
| Sponges | To dab and create texture |
| Palette | Mixing secondary colors |
| Paintbrushes | Different sizes for edges |
| Painter’s Tape | Protecting edges and frames |
Equip yourself with a variety of brushes. A wide roller covers large areas quickly. Use sponges to create a natural texture. Don’t forget the painter’s tape for clean, sharp edges!
Prepping The Surface
Cleaning the Wall is essential for a successful faux stone finish. Start by removing all dirt and debris with a soapy solution and a sponge. Rinse with clean water. Allow the wall to dry completely. A clean wall ensures better primer adhesion.
Applying Primer for a Lasting Finish requires a steady hand and attention to detail. Use a high-quality primer suitable for the wall’s material. Spread an even coat with a paintbrush or roller. Let the primer dry as instructed by the manufacturer. This step is vital for paint to stick well.
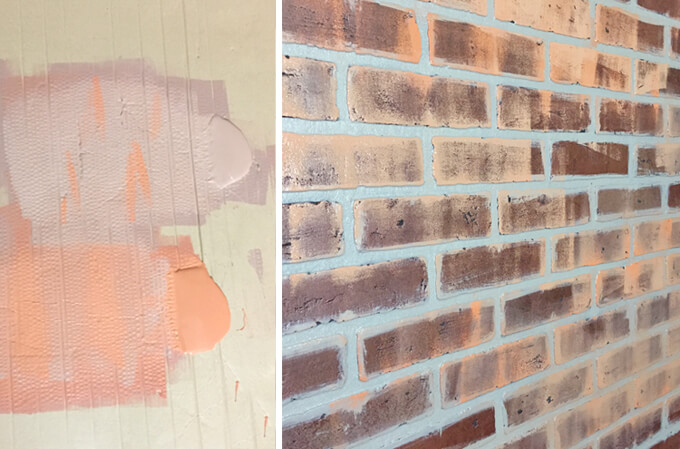
Credit: grayhousestudio.com
Techniques For Stone Patterns
The Sponge Painting Method creates a textured look. Dip a sea sponge in light gray paint. Blot it on paper to remove excess paint. Dab the sponge on your wall lightly, creating a stone-like pattern. Let it dry.
For Layering Colors for Realism, use different shades of gray. Start with a dark gray base layer. Once dry, add lighter gray tones. Focus on random areas to mimic natural stone. Always let each layer dry completely.
Use a small brush for detailed edges. This makes the stones pop. Seal with clear coat for durability. This method takes time but creates a realistic faux stone wall.
Adding Texture And Dimension
Creating a faux stone wall involves playful imagination and some handy tools. Your goal is to add texture and dimension to a flat surface. Texturizing tools like sponges, brushes, and combs will become your best friends. With these, you can dab, stroke, and carve to mimic the natural roughness of stone.
To make your painted wall look even more like real stone, you will need to craft faux grout lines. Achieve this by taping off sections to represent seams. Use a small brush or a paint pen to fill in these sections with a light grey or white paint. This technique gives your wall a 3D effect, making it pop. Take your time and be creative; each grout line adds to the illusion.
Finishing Touches And Sealant
To make your faux stone wall look real, focus on detailing. Use different shades of paint to add depth and texture. Small brushes can help with crevices and shadows. Make sure each stone has unique characteristics.
Sealant is vital for protection. It keeps the paint from chipping and makes your wall last longer. Choose a sealant that matches your wall’s look and feel. Apply it with a smooth, even coat.
Maintenance And Care Of Your Faux Stone Wall
Proper maintenance ensures the longevity of your faux stone wall. Regular cleaning keeps it looking new. Use gentle soap and water for routine washes. Avoid harsh chemicals that can damage the surface.
For small scratches or chips, matching paint can be applied. A small artist’s brush works well for touch-ups. Sealants can provide extra protection; apply as needed. Refer to the manufacturer’s instructions for specific care products.
| Issue | Solution |
|---|---|
| Scratches | Apply matching paint with artist’s brush |
| Chips | Fill with paint; use sealant if required |
| Discoloration | Clean with mild soap; rinse thoroughly |
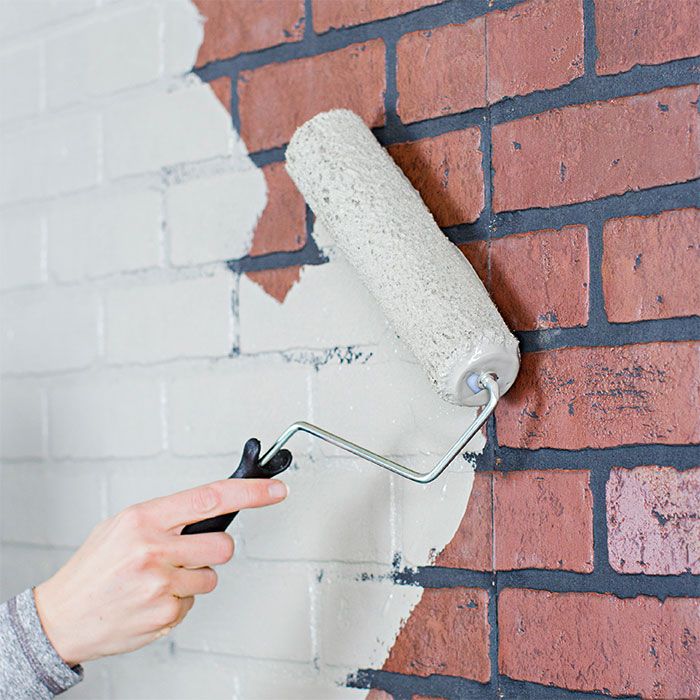
Credit: www.lowes.com
Conclusion
Creating a faux stone wall effect is a unique way to revamp any room. With the tips provided, you’re now equipped to tackle this DIY project confidently. Remember, patience and practice will yield the most convincing stone-like finish. Let your creativity flow and transform your space into a rustic haven.
Happy painting!
I’m Robert M. Payne, a passionate enthusiast for turning houses into dream homes. With a knack for DIY projects and a keen eye for design, I’ve dedicated myself to sharing my knowledge and experiences in the realm of home improvement.
As a seasoned homeowner and avid DIYer, I understand the challenges and joys that come with transforming living spaces. Through Myhomemyworld, I aim to inspire and guide fellow homeowners on their journey to creating spaces that reflect both functionality and style.
Cheers to creating spaces that truly feel like home.
Connect with me in facebook